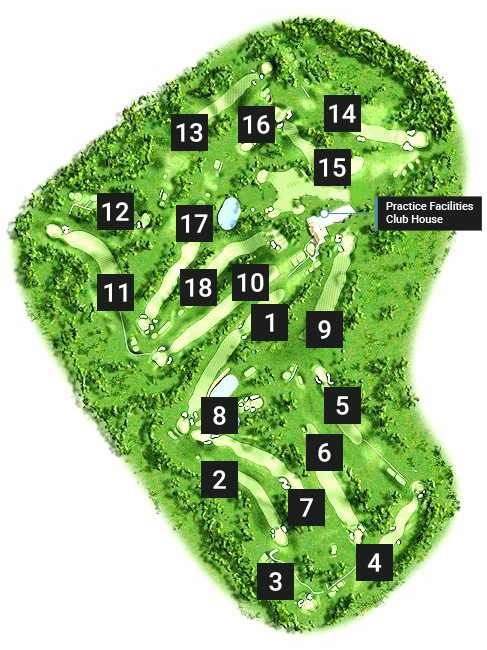
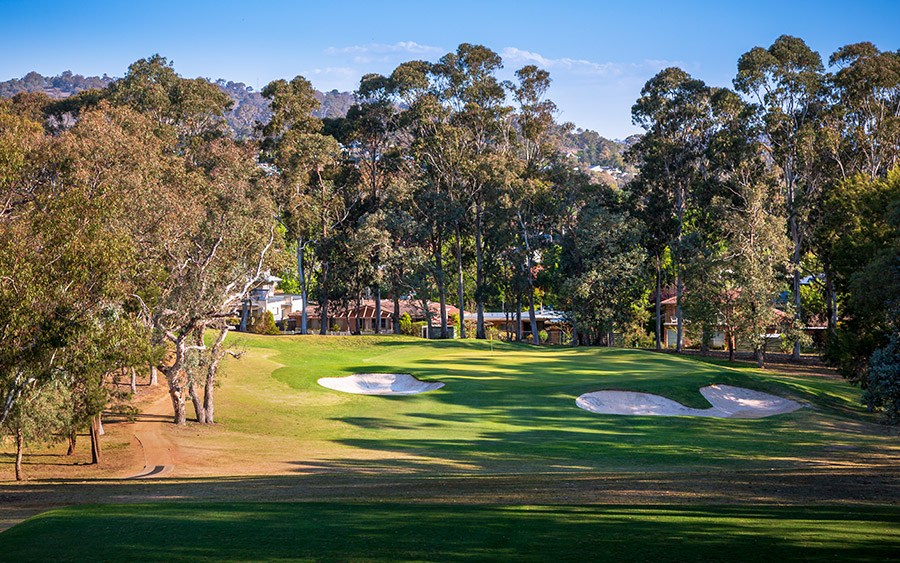
The 18 hole championship course features pristine Santa Ana couch fairways and quality bent grass greens which are protected by well-placed bunkers. The bushland setting features grand views of the Brindabella Ranges, contributing to the special place that is Federal Golf Course.
The course has featured in the Golf Digest Top 100 Australian Courses, with a current ranking of 48 in Golf Australia’s best public access courses.
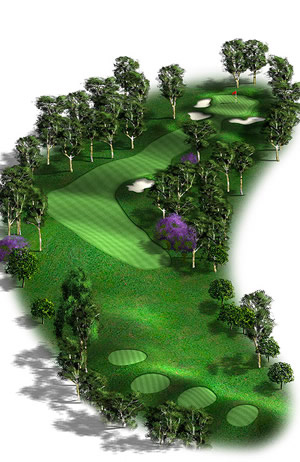
A gentle opening hole, slightly downhill from the tee with a bunker on the left of the fairway. Keep your drive to the right side of the fairway or you will find the bunker. Long hitters may clear the bunker but watch out for the pond on the left-hand side which will punish an errant long drive or wayward second shot. From the bunker the fairway dips further before an incline to the green with bunkers on both sides.
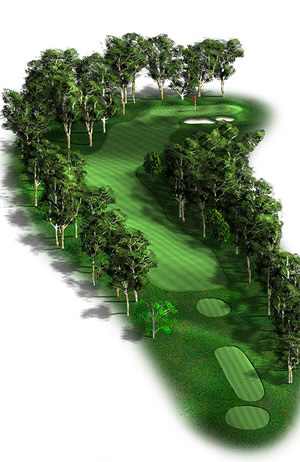
A dogleg to the right with a blind tee shot. The green is protected by two shallow bunkers on the right, and a deeper bunker to the front left of the green. To the rear and left there is a steep embankment running down from the green.
A challenging hole from an elevated tee to a green protected by bunkers on both sides. Your tee shot must carry onto the green or you will have a tough up and down.
A slight dogleg left with a bunker on the left of the fairway. From the bunker there is a steep incline to an elevated green with two bunkers to the right and a grass pot bunker front left. Watch for the false front on this green.
A short but tricky hole. The fairway slopes gently right to left and accuracy is at a premium. A shallow bunker on the right and a deeper bunker on the lower left of the green provide a narrow entrance and penalise the wayward second shot. A difficult green to read that is fast downhill with a steep slope off the rear and the left side of the green.
A wide, straight fairway slopes gently from left to right. Bunkers protect both sides of the opening to the green with the front left bunker not visible until players are close to the green.
A dogleg left with a large bunker on the left-hand side at the bend. Long hitters will need a very good drive here if you wish to carry the bunker. The pond on the right-hand side is in play for any wayward second shot. There is a narrow entrance to a tiered green protected by two bunkers on the right and one bunker front left of the green. The mounds left of the green provide additional problems for the wayward shot.
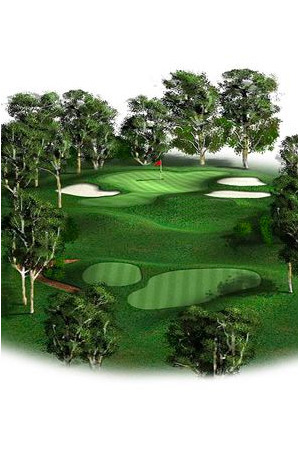
Hit over the pond to a heavily-bunkered green which will punish anything short. The entrance is narrow and the green is deceptively long. Getting up and down from the left bunker can be challenging.
A tough par 4 by any measure. From the blue tees the hole doglegs to the left around a large eucalypt dominating the left side of the fairway. The fairway slopes from right to left, levelling out on the approach to a tiered, sloping green with bunkers set to the left. Two well-placed shots are required to get there in regulation.
Enjoy the view and settle down after the tension of the front nine. A long, straight downhill fairway slopes from left to right and demands placement off the tee. Bunkers protect both sides of the entrance to the green. The bank at the rear of the green slopes away steeply. Straight hitters are rewarded on this hole.
A testing hole for any level of golfer. It requires a solid tee shot from an elevated tee across a gully to an elevated green protected by a deep bunker to the front right and grass swales to the left and rear of the green. Beware, putts from above the hole will test your lagging skills.
A par 5 with a slight dogleg right. Drive across a valley to the bend from where a slight downslope becomes a gentle incline to the green. Bunkers on both sides of the fairway protect the approach to the green and a deeper bunker guards the front right of this green. Watch for the false front on the green.
A challenging dogleg left requiring two well-hit shots to get there in regulation. The drive is from an elevated tee downhill to the bend. A shallow bunker on the right of the fairway and the large bunkers to the front left and front right of the green protect this hole. Beware the false front on the green, anything short will spin back off the green. You’ll be pleased to walk off here with par.
All but the very best golfers will require something less than driver to position your tee shot. A dogleg right requiring a well-placed tee shot for a clear approach to the green. Drive from an elevated tee to the bend where there is a shallow bunker on the right. A steep incline to an elevated, tiered green protected by bunkers front right and left requires judgment. There is another bunker to the left rear of the green. This is an attractive hole with plenty of bite.
This short hole is slightly downhill from the tee to a heavily bunkered green. Missing the green will leave a tough up and down. To the rear a steep bank falls away from the green. This is definitely a sleeper that can ruin a great card.
There are lovely views from this hole too. Drive uphill to a crest, past a fairway bunker on the right, and from there the fairway turns slightly to the right, leaving a gentle downhill run to the green. The four greenside bunkers are there for a reason, so take care. There is a gentle left-to-right bias on the fairway. Play it smart and you’ll be rewarded.
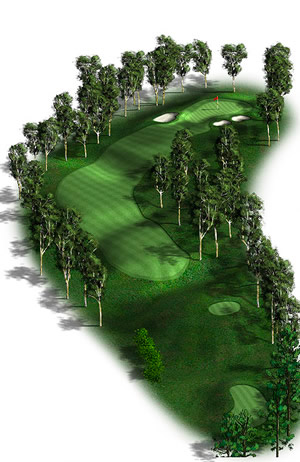
This is the index 1 hole and the toughest par 4 in the district for golfers at any level. It’s uphill all the way to the green. Save your best drive for this last tee shot. A strong, well-placed drive left of centre will leave you with a demanding shot to an elevated, sloping green guarded by two deep bunkers with sharp teeth. The steeply banked entrance to the green provides added protection for this very challenging hole.
MEN Par 4
LADIES Par 4
Blue Tee: 386m
Red Tee: 326m
White Tee: 380m
Request Corporate Golf Packages information
Please fill in the form below, and we will
email you a link to our Corporate Golf Packages brochure.